by Will Stanley
What you need: A projector
Time required: One hour
You’d be forgiven for thinking that projectors are incredibly expensive and only intended for home-cinema enthusiasts with a few thousand pounds to spare. While this is true for high-end projectors, the rest of us can save most of that money by opting for something less powerful. Although cheaper projectors can’t match the image quality and projection size (particularly in daylight) of more expensive models, they’re still great for watching films, projecting your PC’s desktop and reliving those family Kodak slideshows of yesteryear.
Contents
Choose your projector
When considering your ideal projector, first decide how big you want your projections to be.
Projectors measure their brightness levels in lumens, and if you want to produce large projections (around 100 inches) during the day without having to draw the curtains, you’ll need a projector that’s rated no lower than 2,000 lumens. Such models are expensive, though, costing
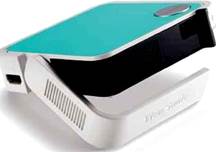
The ViewSonic Ml Mini Plus is portable, affordable and performs well with low ambient light levels
over £.
If you’re happy viewing only in darker conditions, or simply want to project smaller images, you can opt for something much cheaper. Our favourite is the ViewSonic Ml Mini Plus (pictured below left), which recently dropped in price on Amazon (www.snipca.com/37680).
Like most budget projectors, the Ml Mini Plus uses LEDs rather than the traditional lamp to produce illumination. While projector lamps are replaceable (usually lasting between 2,000 and 4,000 hours, and costing over £ to replace), LEDs are fixed – so when they die, so does your projector. However, LEDs also last much longer than lamps – those in the Ml Mini Plus are rated at 30,000 hours, which is equivalent to using the projector for five hours every day for over 16 years, at which point you’ll probably want a new projector anyway.
The Ml Mini Plus is rated at 120
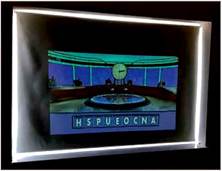
Even in a room with ambient light, we managed to produce a 60in display with the Ml Mini Plus
like much, we found it was enough to create a perfectly viewable 30in display during the day with the curtains open. With the curtains drawn, we projected a decent 60in display (pictured above), while in pitch-black conditions we managed to extend this to over 100 inches.
At about the same size as five stacked coasters, and similar in weight to an empty pint glass, the M1 Mini Plus is very portable. Although the built-in battery won’t quite stretch to a feature-length movie (lasting around 80 minutes in our tests), it’s fine for showing shorter clips or for photo-sharing. As we’ll explain later, the projector is packed with connection options, including HDM1, USB, Wi-Fi, Bluetooth and even some built-in storage.
Budget projectors come with compromises. The 854×480-pixel resolution of the Ml Mini Plus means it won’t do HD or 4K content justice, and on larger projections you’ll be able to make out individual pixels if you look closely enough. It also has a relatively low contrast ratio (the difference between its brightest white and darkest black) of 500:1, which means its results aren’t as vivid as those from more expensive models – the BenQ W2700 (see box on page 37) has a contrast ratio of 30,000:1, for example.
Cheaper projectors also tend to have slower refresh rates (how many frames they can show each second). The M1 Mini Plus is rated at 60Hz (60 frames per second), and we noticed it struggled to maintain a sharp image in fast-paced movie scenes. More expensive projectors let you project at 120Hz, which allows for much smoother video.
Set up your projector
Most projectors take you through an initial setup process when you turn them on for the first time. On the Ml Mini Plus, this involves selecting how you’ve positioned the projector (if you hang it from the ceiling, the display will be flipped over) and connecting it to your home Wi-Fi. Entering a long Wi-Fi password using a tiny remote control is fiddly, so we were glad we were able to connect our Logitech keyboard and mouse via the Ml Mini Plus’s USB port.
Once you’ve learned the basics, you can start configuring your projected display. Some high-end projectors offer auto-focus, but with most models you’ll need to adjust focus using a focus wheel. To do this we recommend projecting a screen containing text (such as the projector’s main menu). One of our few complaints about the Ml Mini Plus is that its focus wheel doesn’t scroll smoothly, which makes fine adjustments tricky.
If you position your projector lower or higher than the spot on the wall you want to project on to (as is often the case), you’ll need to adjust the projector’s angle – this is done using the flip-out stand that surrounds the projector. To avoid the ‘trapezium effect’ this creates (depending on the angle, the projection will be wider at either the top or bottom), most projectors include a tool called keystone correction. The Ml Mini Plus does this automatically, adjusting the keystone correction as you tilt the projector. This worked well in our tests, but you can fine tune it if needed via the Basic Settings section in the main menu.
You can also adjust image settings depending on what you’re watching (on the Ml Mini Plus, hold the OK button on the remote control for a few seconds to access these), tweaking the brightness, contrast and colour temperature to suit your needs.
Project live TV and films
Most projectors have an HDMI port, which lets you quickly connect video sources such as a Sky or Freeview set-top box, or DVD player. Because your video source is probably already attached to your TV set via an HDMI cable, you can simply remove the cable from the TV and plug it directly into the HDM1 socket on your projector. Your projector should detect that you’ve plugged in a new video source and start displaying it immediately (on some models you may need to select the HDMI source in the main menu).
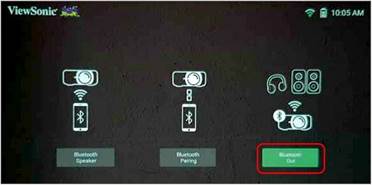
Boost volume on the M1 Mini Plus by pairing it with a set of Bluetooth speakers
Will Stapley
Depending on which projector you have, you may also be able to connect video sources other than via HDMI. Thanks to its built-in Wi-Fi, the Ml Mini Plus lets you stream TV programmes and films via apps (which you can install by selecting AppsCenter from the main menu).
The results are a mixed bag, though. In our tests, the Amazon Prime Video app worked well – once we’d logged into our Prime account. We were able to browse and watch shows as easily as we can on our PC. Additionally, the Plex app let us connect to the Plex server on our PC, allowing us to stream content from our PC as well as from Plex’s range of free TV and movie offerings. However, the BBC iPlayer app didn’t work and just displayed a message telling us to ‘upgrade to the latest version’.
While most projectors have built-in speakers, they’re often pretty quiet. The Ml Mini Plus manages to produce better audio than most thanks to its built-in 2W speaker, but you’ll want something more powerful when watching a film.
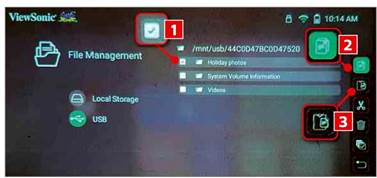
Copy content from a USB stick to the internal storage of the M1 Mini Plus
One option is to connect a set of speakers to the video source (if you’re projecting from a DVD player, you could attach speakers to the audio outputs on the DVD player itself). Because the Ml Mini Plus has built-in Bluetooth, you can also connect the projector directly to a set of Bluetooth speakers or headphones. First, set your speakers to pairing mode (this is usually achieved by pressing a dedicated pairing button), then go to the main menu on the Ml Mini Plus and select Bluetooth. Bluetooth Out (see screenshot below left) and select your speakers.
If your chosen projector supports screen mirroring (as the M1 Mini Plus does), you can also stream video from your phone – either your own videos stored on the phone or from apps like BBC iPlayer. However, on our Android phone (a Samsung Galaxy S8), video streamed in this way had a nasty juddery effect. Instead, mirroring is best left for photosharing sessions, as we explain below.
Set up a photo slideshow
Once holidays are permitted again, we’ll all have new batches of photos we’ll want to share with friends and family. Don’t make them squint at your phone’s tiny display or crowd around your PC screen – instead, use your projector to display your photos in all their glory.
You can do this simply by connecting the projector to your PC, but that will mean trailing an HDMI cable between the two. The Ml Mini Plus provides neater alternatives. One is to copy your photos to a USB stick, then insert this directly into the projector’s USB port. Accessing the USB stick is a little fiddly – you have to select File Management from the main menu, press the Back key on the remote control, then select the USB stick and navigate to the folder containing your photos. Once you’ve located your photos, however, you can browse them using the remote or simply let the Ml Mini Plus cycle through them in order.
With your USB stick inserted, you can copy photos (and videos) to the Ml’s 4GB internal storage. In the File Management window (see screenshot above), hold the OK button on the remote control for three seconds, select the files or folders
Use screen mirroring to share photos from your phone
you want to copy 1, then select the Copy option 0. Next, press the back button on the remote, select Local Storage, then the folder you want your photos copied to, then hold OK again, followed by Paste 3.
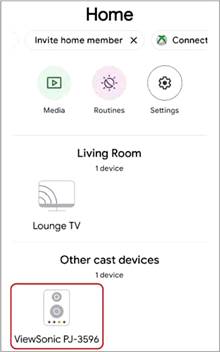
For photos stored on your phone, it’s best to use the screen mirroring feature of the Ml Mini Plus. Select ‘Screen Mirroring’ in the main menu, then follow the instructions for iOS and Android devices. On our Samsung Galaxy S8. we had to open the Google Home app on the phone, select the projector (ViewSonic projectors are listed as ‘PJ-’, followed by four numbers – see screenshot above), then ‘Cast my screen’. Our phone’s screen was then projected, allowing us to open the Google Photos app and locate the photos we wanted to share.
Project your desktop
If your PC or laptop has an HDMI output, you can connect it to your projector in the same way as any other video source, letting you browse the web, share a document at a club meeting or even enjoy Microsoft Flight Simulator on a big screen.
Once connected, you can tell Windows how to use the projector. Press the Windows key+P to open the Projector sidebar, then choose whether to duplicate your PC screen on the projector, extend the desktop across both your monitor and the projector, or only use the projector.
THE BEST THREE HD & 4K PROJECTORS
Although the M1 Mini Plus can connect to HD and 4K video sources, it downscales the video. To get the best image quality, you’ll need to spend more and buy an HD or 4K projector. Here are our top picks.
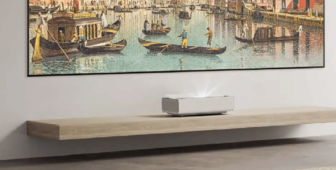
This 4K projector has a brightness rating of 2,000 lumens and is able to create sharp projections that are up to 200 inches.
which look better than those produced by models more than twice its price.
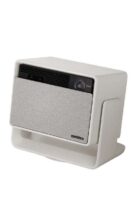
LG PF50KS
This HD projector is less than half the price of most 4K models, but still performs impressively. It’s rated at 600 lumens, so you’ll need to draw the curtains when using it for larger projections.


Founded in July 2014, 7Review is a free audio resource for beginners, and we're dedicated to helping you create the ultimate movie-watching experience right at home. We pull insights from top audio magazines and trusted industry sources to bring you well-researched, reliable reviews and tips. Whether you're a home cinema pro or just starting out, we aim to give you the info you need to make the best choices for your setup.