How to set up your turntable
How to set up your turntable
Taking the time and effort to properly fettle your turntable ensures you’ll reap the sonic rewards.
Here’s how you go about it
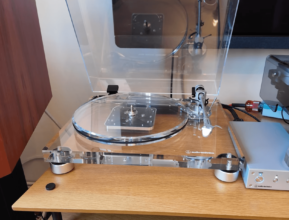
Unlike a CD player or a streamer, the turntable is not a plug-and- play device. To get the very best from it, great care needs to be taken to ensure that it is correctly set up. Happily, this is not as difficult as you might imagine and there is a wide selection of inexpensive accessories available to help.
Before considering any form of adjustment, it is important to make sure the record player itself is level. The stylus is held in the groove entirely by gravitational force, and any imbalance means the downward force on it is not exactly perpendicular to the disc.
On the level
Many turntables are fitted with adjustable feet and levelling is easily done using a spirit level. Place the level on the platter, to allow any variation in manufacturing tolerances to be adjusted out. A better solution is to use a level that fits over the central spindle, like Blue Horizon’s Prolevel tool (HFC 373).
Assuming your cartridge has been fitted according to the manufacturer’s instructions, the next step is to set the tracking force. This is usually done by setting both the tracking force adjustment and the bias adjustment on the tonearm to zero and then moving the counterbalance weight so that the arm is perfectly horizontal. Make sure you remove any stylus protection cover as this will affect the weight of the cartridge. Now set the tracking force adjustment on the tonearm to
It’s surprising how much fluff can accumulate around the stylus from airborne dust
the correct value according to the cartridge manufacturer. This is good enough to enable the other adjustments to be made before the tracking is set more accurately later.
Now we can align the cartridge. This involves setting the azimuth or vertical alignment, the overhang and the angle of the cartridge in the headshell.
Setting the azimuth simply involves making sure the stylus is perpendicular to the record when the cartridge is viewed from the front. Placing a small mirror on the platter and gently lowering the stylus onto it will highlight any misalignment. If your headshell does not have an adjustment for this, fitting a small paper shim between the cartridge and the headshell will suffice.
The overhang and the angle of the cartridge in the headshell are set using an alignment protractor, sliding the cartridge forwards or backwards and twisting it in the headshell so it lines up with the calibration marks on the gauge. The overhang is the difference between the distance of the tonearm pivot from the centre spindle (which is fixed for a given tonearm) and the distance of the tonearm pivot to the stylus (which is known as the effective length).
The calculations required to work out the optimum positioning of the cartridge are not particularly straightforward. Fortunately, alignment protractors are available to help (you can download a free one online from: vinylengine.com/cartridge-alignment- protractors.shtml). All you have to do is decide which calculation model you wish to
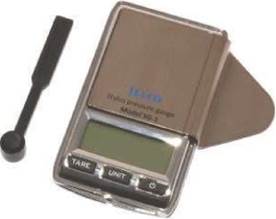
Jelco’s SG-1 digital stylus gauge (HFC 443) makes setting the tracking weight simple
Upgrading the cartridge can bring big improvements to a deck’s sound – see our MC roundup (HFC 434)
use. As long as you follow the instructions, you should achieve satisfactory results.
Once the cartridge is exactly where it should be in the headshell, it’s time to set the tracking force. The markings on a tonearm are notoriously unreliable for making this adjustment force and the only way to do it properly is to use a stylus balance.
The cartridge manufacturer will usually specify a range for the tracking force, and you should set the force to a value within that range – but what value to use? A test record is useful for deciding this, but not essential. Usually records have a tracking ability test consisting of a tone recorded at increasing amplitudes, which can assist in
Before tackling any form of adjustment, it is important to get the record player level setting the tracking weight and bias. Too low a tracking weight will result in poor tracking and do more harm to your records than erring on the high side, but don’t overdo it. Tracking ability depends on your tonearm and cartridge combination. At very high levels of the test tone, your cartridge will start to miss-track and this will be indicated by a buzzing sound.
The bias adjustment (sometimes referred to as the anti-skating) exerts a small outward force to the tonearm to counteract the tendency of the arm to swing towards the centre of a record when playing. Usually, the tonearm’s bias adjuster has markings on it and you set it to the mark corresponding to the tracking force applied. However, if you have a test record, you can set the bias more accurately by the tracking ability test and when the point is reached when the cartridge starts to miss-track, there should be the same level of buzzing on both channels.
The last adjustment to make is the tonearm height to set the Vertical Tracking Angle (VTA), which sets the Stylus Rake Angle (SRA) of the cartridge. The VTA is the angle of the cantilever to the record surface (usually around 20°), which in itself is not that critical.
However, the SRA, which is the angle of the stylus in the groove, is vital and has a major impact on sound quality. The closer the SRA can be adjusted to match that of the original cutter head, the more information the stylus will retrieve from the groove. The VTA will vary depending on the tracking weight, so it is important to set this before attempting to adjust the VTA. The VTA is adjusted by altering the height of the arm (which may be via an adjuster built into the tonearm or by adding or removing shims from the tonearm mount), and the correct point is best determined by ear. A good starting point is to set the arm height so that it is parallel to the record when it is playing and to choose a well-known record with some bass and either a solo violin or a female vocalist. If the arm is too high (VTA too great), the sound will be harsh and thin with poor imaging. If set too low, it will be dull with ‘boom/ bass, lacking detail and with poor imaging. The correct point is unmistakable where the instruments and vocals snap into focus and everything sounds clear. A simple gauge can be made using a piece of card temporarily fixed to the turntable to help adjust the height and note the position where the VTA is correct.
Having taken the time to set everything up correctly, it is important to keep it all as clean as possible. Apart from cleaning the record playing surface using a wet cleaner or record cleaning machine of some sort, we recommend cleaning off any dust before every play. There are many cloth and brush accessories available for this purpose, but we prefer using a carbon-fibre brush. And remember that if you buy second-hand records it’s always a good idea to give them a thorough wet clean before playing. Always replace the inner sleeve with a polyethylene or paper and polyethylene product to avoid re-contaminating the cleaned record from any residual dirt left inside the old sleeve.
It’s surprising how quickly fluff can accumulate around the stylus from airborne dust after only playing a couple of sides – even with records that you thought were scrupulously clean. With a carbon-fibre or fine hair stylus brush, the way to clean a stylus is to gently brush from the rear of the cartridge forwards towards the front. Occasionally, the cantilever and cartridge underside may also require a gentle brush. Another popular cleaning method is to use a stylus cleaning putty or cleaning substance where the stylus is gently lowered into the cleaner to remove the dirt.
Bear with us
The final thing to mention is the turntable main bearing. Many bearings require some form of lubrication and they will also require occasional cleaning, the frequency of which will depend on use. It’s a good idea to clean these once a year and replace the bearing oil. A special high-performance oil of the correct viscosity for your bearing needs to be used, and you’ll find oils specifically blended for this purpose available from your turntable manufacturer and audio accessory supplier.
As modern bearings are high tolerance, a completely lint-free cloth should be used to avoid any risk of leaving debris in the central bearing or around the central spindle.
It’s important to be aware that some bearings have a small ball bearing inside, so be careful if you plan to turn your deck upside down to clean it.
So there you have it.
Although setting up your turntable might initially appear rather daunting, the truth is if you carefully carry out the steps in a methodical fashion, you’ll be rewarded with superb sound from your record player. So put the mag down, follow the simple steps explained above and go and rediscover the joy of properly reproduced vinyl •

Pro-Ject’s VC-S (HFC 410) record cleaning machine is an ideal way to clean vinyl


Founded in July 2014, 7Review is a free audio resource for beginners, and we're dedicated to helping you create the ultimate movie-watching experience right at home. We pull insights from top audio magazines and trusted industry sources to bring you well-researched, reliable reviews and tips. Whether you're a home cinema pro or just starting out, we aim to give you the info you need to make the best choices for your setup.